I have always been a big fan of chalkboard subway art. Especially now, with chalkboard art being very popular, I have recently been inspired to make my own. I am particularly a fan of the first birthday chalkboard signs. The only problem with these signs is that you need to know someone who is having a birthday. As it turns out, I know just the person to make this sign for!
For this first birthday sign I have decided to design it using Silhouette Studio. Now, if you don’t have Silhouette Studio software, you should definitely download it. You don’t even have to own a Silhouette cutting machine in order to be able to follow this tutorial.
The first step is deciding what kind of chalkboard theme you want to make. You aren’t limited to just designing a sign for a first birthday. You could make a chalkboard to mark any age birthday, an anniversary, a graduation, a year in school or any milestone in life. The possibilities are endless!
Once you have picked out a chalkboard theme, open up Silhouette Studio and navigate to Page Design Settings. Change your page size to the desired height and width. I choose 24” x 36”. Notice how your page will expand over the cutting mat size- this is how is it supposed to look.

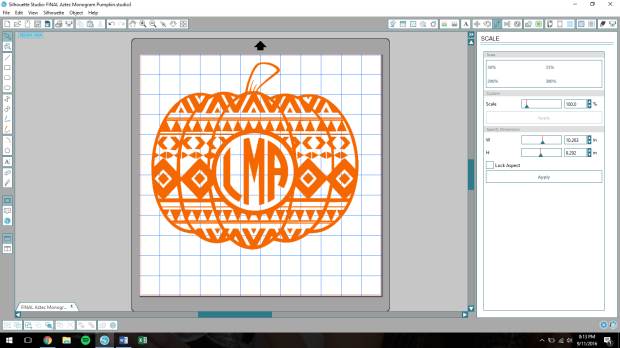
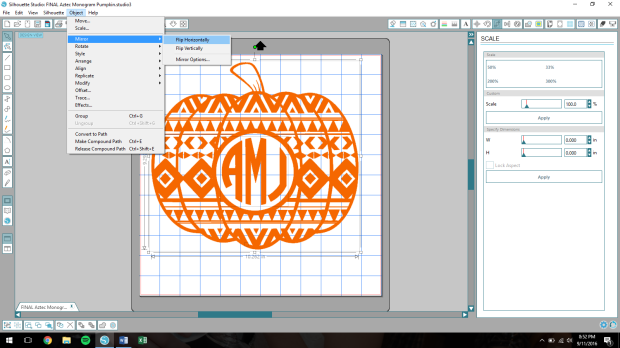
From here, choose a chalkboard background (I used one from the Silhouette Design Store). Under the Scale tab, adjust the chalkboard to fit the entire mat background. You will need to uncheck the “lock aspect” box and enter your desired dimensions. If you have Silhouette Designer edition, use the Layers Menu option to lock your background. Also note, a yellow caution size has appeared to warn me of low resolution. However, the background did not appear to be fuzzy or blurry once it was printed if you choose to use this same chalkboard design from the Silhouette Design Store.

Now the fun part…time to design. I have seen numerous chalkboard subway art that I have fallen in love with. Have fun and design to your liking. You can add picture elements and word elements. I used the following fonts for my word elements:
KG Broken Vessel Sketch | Daydreamer | Rolande | Wide Latin | ITC Woodland | Bromello Photographs | KG Blank Space Sketch | Creta | KG Miss Kindergarten | KG Miss Kindy

Once you are finished designing, it’s time to print your design. I made sure to group my whole design together so none of the elements would move. In order to print your design, you will need to save the file as a PDF. In Silhouette Design Studio, there is not an option to save as a PDF. Instead, you can “print” your design as a PDF using a PDF printer. There are many different options for this…Bullzip, CutePDF or PrimoPDF. Once you have one of these PDF printers installed on your computer, go into the settings and change the size of the page to whatever size your final design is. For mine, I changed the size to 24″ x 36″. All you’ll do now is hit print and it will produce a PDF file. Use this file to bring to Staples and print your over-sized design.

To save some money, I decided to print my project as a color engineering print. An engineering print usually have lower visual and paper quality than traditional prints. This was a great option for my subway art because it kept the cost low. When I want to print at Staples, I typically just go through their website. You can find black & white, as well as color engineering prints on their website. Select the size you wish to print, upload your subway art and ta-da, you’re finished! Staples will notify you once your print is ready to pick up.
The final step is layering your engineering print on a background. I purchased some black foam board from Hobby Lobby and cut it down to the correct size. Take some spray adhesive and slowly layer the engineering print onto the foam board. Use a credit card or Silhouette scraper to smooth out any bubbles. Good news- even if you do have some small bubbles that can’t be released, the chalkboard background does a good job at covering up those mistakes.